Time Machine is a simple and intuitive program for automatically backing up your files, but sometimes it can get a little picky. Next time it throws a fit, check out these easy steps to help set it straight again.
“Unable to complete backup. An error occurred while copying files to the backup volume.”
If you come across this particular error, you can usually fix it by going into the drive on which your Time Machine backups are located. Navigating through the Time Machine file structure, you should see a number of folders with dates on them. Among these folders, you might find one that ends with a .inProgress extension. Delete this file and attempt another backup. If you still encounter the same error, you may have to disable fast user switching (System Preferences > Accounts > Login Options) and restart your Mac first.
Time Machine stops during the initial backup
When you’re first setting up Time Machine and initiating the first complete backup, it may get to about 10GB of your data and then stall. This is most likely due to your external drive not being formatted correctly. Although Mac OS X may be able to read and write from it normally, some hard drive manufacturers include a Master Boot Record partition scheme when the product ships, which Time Machine doesn’t like. I won’t go into the details of how and why this affects Time Machine — you just want it fixed, right? To do so you’re going to have to erase the entire contents of the external hard drive. Make sure you copy any important files already on the drive because they will be permanently deleted.
- Open Disk Utility and select the disk where your backups are to be located.
- Click the Partition tab and ensure Mac OS Extended (Journaled) is selected as the format.
- Choose your desired number of partitions by going to the Volume Scheme menu. If you’re only using this disk for Time Machine, only one partition is necessary.
- Click the Options button and choose your partition scheme. If you have an older PowerPC-based Mac, you will want to choose Apple Partition Map. If you have a newer Intel-based Mac, choose GUID.
- Pressing OK and then Apply will completely erase the drive. Once completed, you can attempt to set up Time Machine again.
“The backup volume could not be found”
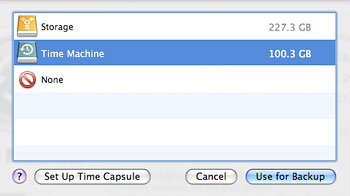
While not normal, sometimes Time Machine might not recognize the drive where backups are supposed to be saved. When this occurs, it is usually resolved with one of two tasks: Disabling your hard drive’s sleep function (if it has one) or reminding Time Machine where to look. This can be done by opening the Time Machine panel in System Preferences and clicking the Choose Disk button. From here, you can select the correct disk volume.

Backups get stuck at “Preparing…” for extended periods of time
Time Machine only backs up files that have changed since the most recent backup, but occasionally it loses its place and needs to index the entire system again. Possible reasons for this unwanted behavior include the user stopping backups while they are in process (by either canceling them or shutting down the computer), not ejecting the backup volume correctly, or going long periods of time without backing up. If you’re running a third-party anti-virus program, you should exclude the Time Machine drive from its locations to scan since this could also contribute to longer “Preparing…” times.

Backup drive fills up too quickly with large virtualization files
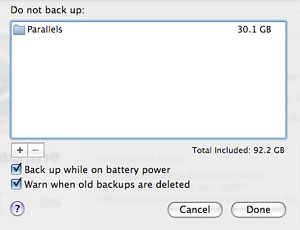
If you use Parallels or VMWare for virtualizing Windows on your Mac, the disk images used by these applications will eat up space on your backup drive at a rapid pace. Whenever you use your virtual machine, Time Machine backs up the entire disk image every time instead of only copying incremental changes. To avoid filling up your backup drive with numerous copies of these large files, add them to Time Machine’s exclusions list. You can easily do this by opening the Time Machine panel in System Preferences and clicking Options. In the window that pops up, click the + button and navigate to the folder when your virtual machine image is located. For Parallels, this would be Username > Library > Parallels. For VMWare, you should find it at Username > Documents > Virtual Machines.


December 28th, 2008, 9:14 PM
Steve,
Does your wife’s MacBook have a computer name with any characters other than letters and numbers? If it does, that might be contributing to the problem. Changing the name to remove those characters and trashing any files created on the Time Capsule by the first failed attempt could solve your issue.