One of Mac OS X’s most overlooked features is Preview, a built-in PDF and image viewer that also happens to have some pretty advanced manipulation and editing tools. Where third party software was previously needed for certain tasks, Leopard’s version of Preview can take care of them out of the box.
Most people only use Preview to take a quick look at a few images or view PDF files. While it’s convenient for those simple purposes, it’s capable of a heck of a lot more. The powerful functionality packed into this application allows users to resize photos, adjust color settings, make PDF annotations, and more. Did you know it can do even more? Here are some of the lesser known and hidden features that make Preview a handy tool any Mac user:
Annotate images too
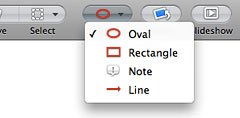
Leopard’s version of Preview introduced annotations for PDFs, but the option was mysteriously missing for photos and other graphics. Even though it doesn’t make much sense, there is a workaround to this limitation. Going to View > Customize Toolbar in the menu bar displays a number of buttons which you can add to the toolbar. Clicking on the Annotate button and dragging it to Preview’s toolbar will enable the feature for images in addition to PDFs.

Merge and rearrange PDFs
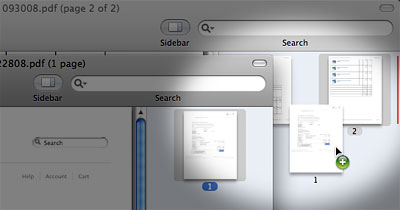
The flexibility offered by Preview is one of its biggest assets. In the case of PDF files, the ability to merge and rearrange pages within PDFs is a true time saver. The trick is all in Preview’s sidebar. To merge two or more PDF files together, open them in Preview and make sure the sidebar is enabled (View > Sidebar) for each window. Merely select the page of your choice in one document’s sidebar and drag & drop it right into the other’s sidebar. Once there you will be able to rearrange page order by dragging them into the desired position. To delete a page from a PDF, click it in the sidebar and go to Edit > Delete.

Print multiple images per page
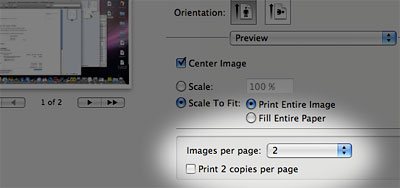
When you’ve got a collection of images to print, you may be tempted to copy the files into a Word or Pages document and position a few of them on a single page to save paper. No need to go through that hassle — Preview’s got that area covered. To start off, locate all of your images in Finder and drag them to the Preview Dock icon together. Another approach would be to use Preview’s File > Open menu item to select all of the images at once. When they are open, you’ll notice thumbnails in the Preview sidebar. Click on one and select all (Command-A). Next, go to File > Print Selected Images. In the dialog box that shows up, take a look at the Images Per Page drop-down menu. Choose the number of your choice and Preview will automatically squeeze them on single sheets of paper.

Remove backgrounds from images
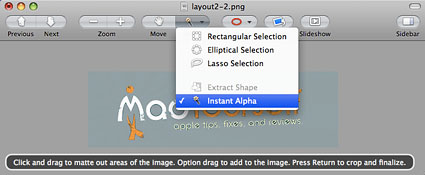
Although not always 100% accurate the first time, Preview’s background removal tools are great to try and experiment with. Give it a shot with a photo of your own by clicking the Select button in the toolbar and choosing either Extract Shape or Instant Alpha. Both have their own strengths and weaknesses depending on the particular file you’re working with. Extract Shape allows you to draw an approximate path around an object to remove everything around it, while Instant Alpha lets you select certain areas of a graphic as Preview matches the color values to determine what else to remove. The best way to get a hang of these tools is to give them a shot and go with the trial & error method. You can really get some impressive results after a bit of practice.

Grab icons from applications
This one may not be practical for everyday use, but it’s pretty cool nonetheless. Have you ever wanted to extract the graphical icon for an application but didn’t know how to get to it? It’s easy with Preview! Browse to your Applications folder in Finder and select the program of your choice. Press Command-C on your keyboard to copy and then open Preview. From the Preview menu bar, select File > New From Clipboard. The entire icon set for your chosen application will open in a variety of sizes and you’ll be able to save the icon in nearly any format.


February 7th, 2009, 12:14 PM
Adam,
Thanks for visiting! To take the screenshots themselves, I use the built-in tools in Mac OS X (via keyboard shortcuts or the Grab utility). Then I bring them into Photoshop and add an extra layer to create the featured “spotlight” area. I hope this helps!