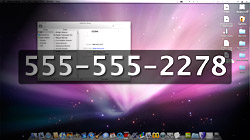
Address Book is one of those essential applications built into Mac OS X, but it never seems to get the attention it deserves. Let’s change that with a list of tips which make using Address Book a more pleasant experience.
1. Mega-sized phone numbers
If you’re across the room from your computer when dialing or showing someone a phone number on your screen, this is a pretty nifty feature. Select one of your contacts and click on the gray label to the left of a phone number. Choose the “Large Type” option and that phone number will blow up to fit your whole screen.
2. Highlight a contact’s group
While viewing your contacts under the All header, you might wonder if a certain person is assigned to any groups. To find out, select the individual’s name and hold down the Option key. Any groups they belong to will be highlighted in yellow in the left column.
3. Add extra fields and edit templates
Let’s say you want to make a record of a contact’s birthday in Address Book. There’s no place to put it by default, but that doesn’t mean it’s impossible. Go to Card > Add Field in the menu bar and you’ll see a whole list of options you can add that person’s card. To add a field to all of your cards at once instead of individually, go to Card > Add Field > Edit Template and the program’s default settings will be updated from there.
4. Dealing with duplicate contacts
There is a feature in Address Book which finds and fixes duplicate contacts automatically. Go to Card > Look for Duplicates in the menu bar and it will offer to take care of any discrepancies that come up. Unfortunately, this method is a little too automatic in that it doesn’t give you much control. Two different people with the same name, for example, might get merged into a single card. You certainly don’t want that, so another (albeit more hands-on) method is to find and Command-click any duplicates yourself, then choose Card > Merge Selected Cards instead.
5. Instant Google Maps
Address Book integrates with Google Maps a couple of different ways. To try out the first, find a contact with a physical address and click on the gray label to the left of it. Select “Map Of” and you will instantly be brought to that location in a web browser. The second method is to choose “Copy URL of map” from the menu instead. Copying the URL is particularly useful for pasting directly into email messages.
6. Default email addresses in distribution lists
One of the best uses for creating groups in Address Book is to manage email distribution lists. In a hypothetical situation, you have a co-worker listed under two groups (Friends and Work) with two email addresses (one for home and one for work). You’ll want to specify that messages sent to Friends list go to your co-worker’s home account and vice versa. The way to do that is by going to Edit > Edit Distribution List. Under each group heading the email address in bold is the default for that particular distribution list.
7. Keep everyone up to date
Letting everyone know when your contact information changes can be a hassle. With Address Book, it’s easy as going to Address Book > Preferences > General and checking “Notify people when my card changes.” Now whenever you update your personal card Address Book will ask if you want to let anyone know and lets you choose which group(s) to notify. The same thing can be done manually by going to File > Send Updates whenever you wish.


July 6th, 2009, 1:55 PM
regarding edit distribution list:
I want to send emails to all email addresses of one contact in my distribution list , not only to one email address. How to do that?